CUTools
Desktop automation, screenshots, window targeting, and image workflows
CUTools is the Windows-facing action layer of SindByte. It combines live screen capture, window discovery, input automation, image adaptation, and prompt-driven visuals so one runtime can both operate the desktop and document what happened.
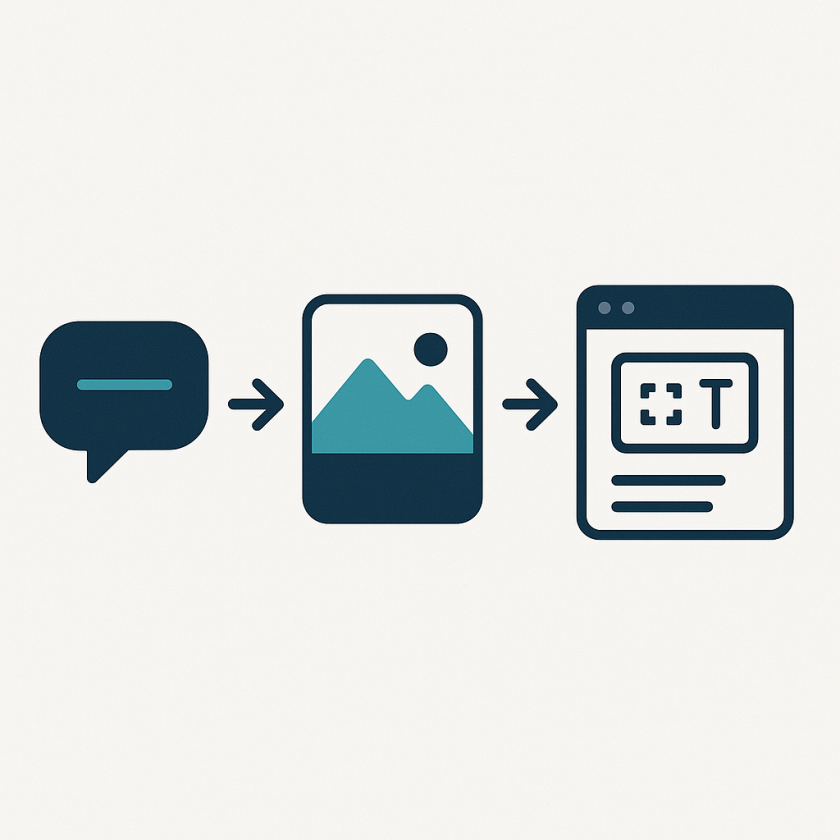
Generated with the live server to explain the capture -> adapt -> publish pipeline used in this documentation pass.
How the CUTools pipeline works
Use
ListWindows, LocateAppWindow, LocateChildWindow, or LocateGUIElement when the workflow must attach to a live UI.Use
Screenshot for proof of the real UI and GenerateImage when a clean explanatory graphic communicates the feature faster.PictureResize and PictureConvert turn raw captures into website-ready assets without leaving the server workflow.The Config Editor decides whether OpenAI-backed image routes are enabled and whether the category is exposed in short or full registration.
Per-tool operator notes
Primary proof tool for manuals, QA, and FAQ pages. Pair it with
PictureResize when captures are too large for page layout.Best for feature diagrams, hero artwork, and one-picture explanations. Requires the OpenAI image route to be enabled in the Config Editor.
These routes stay important even without dedicated detail pages: crop to focus, edit for clarity, then analyze when a workflow needs machine-readable understanding of the capture.
Use it when a desktop workflow should hand extracted or prepared text into a local LM Studio model instead of a cloud provider.
Why these tools convince
Control any Windows application programmatically - without API access, without SDK, simply via GUI automation!
Screenshots at the push of a button, including image editing - documentation almost creates itself!
Position, maximize, minimize windows - your desktop organizes itself according to your rules!
Test applications automatically - simulate clicks, inputs and workflows without programming!
Perfect for:
Time Savings Overview
Create screenshots of the entire screen or specific areas. Document states or errors.
Simulate mouse clicks at specific positions. Automate click interactions with applications.
Simulate keyboard input. Automatic typing of text or pressing key combinations.
List all open windows. Determine window titles, handles and status of all applications.
Determine the current state of a window. Check if a window is minimized, maximized or active.
Change the state of a window. Minimize, maximize, restore or activate windows.
Find the window of a specific application. Determine position and size of the main window.
Find subordinate windows (child windows). Locate dialogs, panels or embedded windows.
Find specific GUI elements like buttons or input fields. Automate interactions with UI controls.
Set position and size of windows. Place windows exactly at desired coordinates.
Change the size of images. Scale screenshots or images to desired dimensions.
Convert images to different formats. Convert PNG to JPG or other formats.
Create images based on descriptions. Generate visualizations for documentation.
Crop images to a specific area. Remove unwanted borders.
Edit images with filters and adjustments. Brightness, contrast, color correction.
Analyze screenshots with AI. Recognize text, elements and context automatically.
Send text to LM Studio for local AI processing. Integration with local LLM.
Typical Use Cases
"Click the login button, wait 2 seconds, take a screenshot of the result"
Test any app without writing code"Take a screenshot of the error message and save it to the ticket folder"
Never forget to document again"Maximize Excel, position the browser on the left half, minimize all others"
Perfect workspace in secondsRelated Categories
Control Your Desktop with AI
Download SindByte for free and automate any Windows application with natural language commands.
Download FreeWindows 10/11 • No coding required • 100% local automation